You can create custom-looking DIY cordless Roman shades with basic sewing skills and a mini-blind hack.
Roman shades offer a convenient solution for tricky window situations. Because they only take the space of the window itself, they are good for small areas where drapes might be in the way. They also offer a great way to soften, but not hide, a beautiful window.

I recently made Roman Shades for my newly decorated dining room. I had made corded Roman shades in the past, but I really wanted these to be cordless. After investigating, it seemed that using a cordless mini-blind hack for the mechanism would be the easiest and most economical way to achieve this. There are many ways to make a Roman shade. You can follow my tutorial (below) or use your own method. As long as your shades have rings on the back and you allow extra fabric to cover the mini-blind mechanism, you can use the mini-blind hack described later in this post.
This post may contain affiliate links, which means I may earn a small commission at no extra cost to you. You may read my disclosure policy here.
Determine the best position for hanging your Roman shades
Before you do anything else, you have to determine how you want to position your Roman Shades. If you have deep window sills, you can hang your shades inside the window casing, covering the window only (inside mount). Windows that are shallow or even flush with your walls, require an outside mount, just covering the window casing.
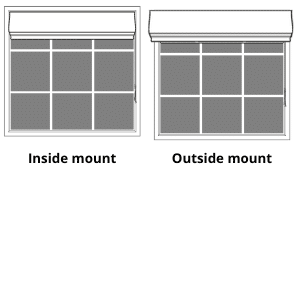
The windows in our house are nearly flush with the walls, but I wanted to hang the shades inside the window casing anyway. Since using screws to attach the hardware to hang the shades could damage the window mechanism, I used 3M Command strips to position my shades inside of the windows. I’ll show how I did this in a later section.
Purchase a cordless mini-blind
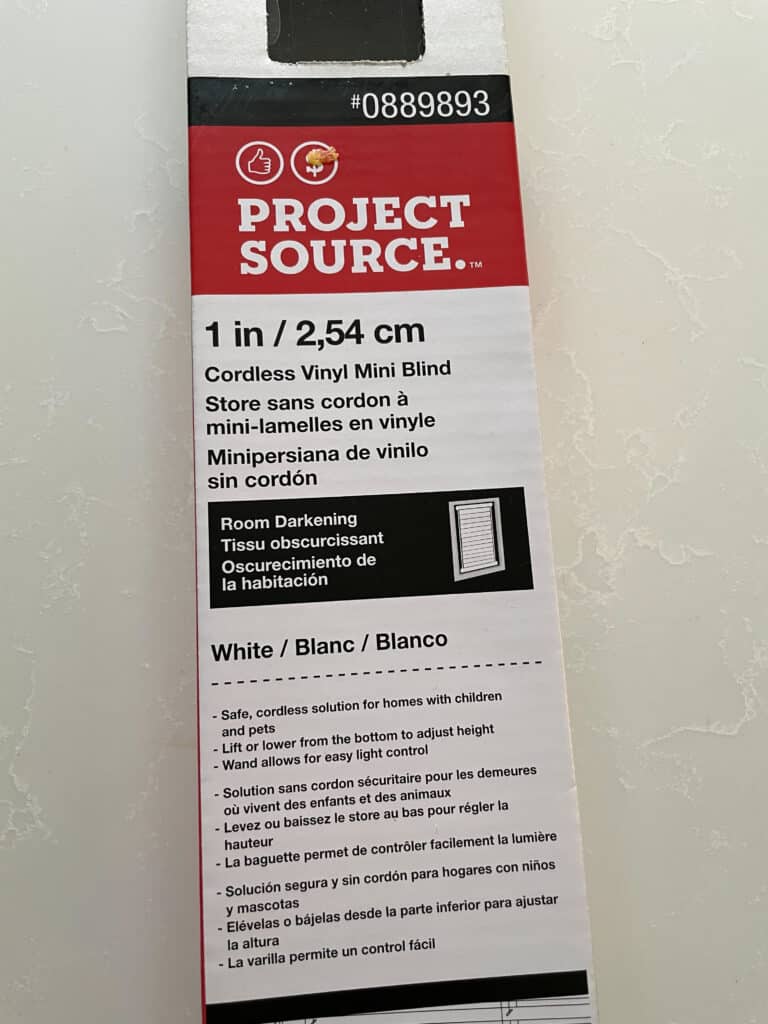
It’s important that you do this before you calculate how much fabric you will need. I chose the least expensive cordless mini-blind at Lowe’s (shown at right and linked in the supply list, below). It doesn’t seem necessary to buy the more expensive options, but this is completely up to you. Keep in mind that you will be removing all of the slats, so whether they are plastic or aluminum doesn’t matter.
Measure to determine the amount of fabric you need
Once you have decided how to position your cordless Roman shades, measuring for fabric is easy. Simply measure the height and width of the space you are covering (either the window or the window casing) and add one inch for a seam allowance. You will also need to allow for extra fabric to cover the top of your mini blind. Remove the mini blind from the box and measure the the height of the top casing that houses the cordless mechanism. Mine was 1½ inches. Add this measurement plus an extra ½ inch to your length measurement.
Example Fabric Calculator using a 35-inch wide x 60-inch long window
Window length – 60 inches
Add seam allowance – 1 inch (½ inch at the top and ½ at the bottom)
Add extra fabric to cover mini-blind – 2 inches (based on a 1½-inch mechanism)
Fabric needed: 63 inches of fabric that is at least 36 inches wide (most are 54 inches wide)
Two yards of 54-inch wide fabric would cover this with a little to spare.
Choose a fabric for your cordless Roman shades
Choosing a fabric was a difficult step for me. There is a lot of pattern in the wallpaper in this room, so I decided to go with a solid linen-look fabric in a white that matched the white in the wallpaper. If you think choosing white paint is difficult, try choosing white fabric! Everything was too cool or too warm, or I didn’t like the weave of the fabric. I finally found the perfect color in a 100-percent linen fabric. It was a little pricier, but I thought it was beautiful and I only needed four yards.
I’ve done a fair amount of sewing, but I had never sewn on linen before. I didn’t know how difficult it would be. The fact that it would wrinkle was a given, but I figured shades wouldn’t get too wrinkled just hanging there, right? What I didn’t know is that linen stretches out of shape, and it puckers. Both of these qualities made it difficult to cut the fabric so that it was straight on the sides. It also made it tough to sew straight lines. Further, it doesn’t hang as neatly as I wanted my shades to hang. I’m embracing it as a very organic, cottagy look, but I would choose something else if I had it to do over.
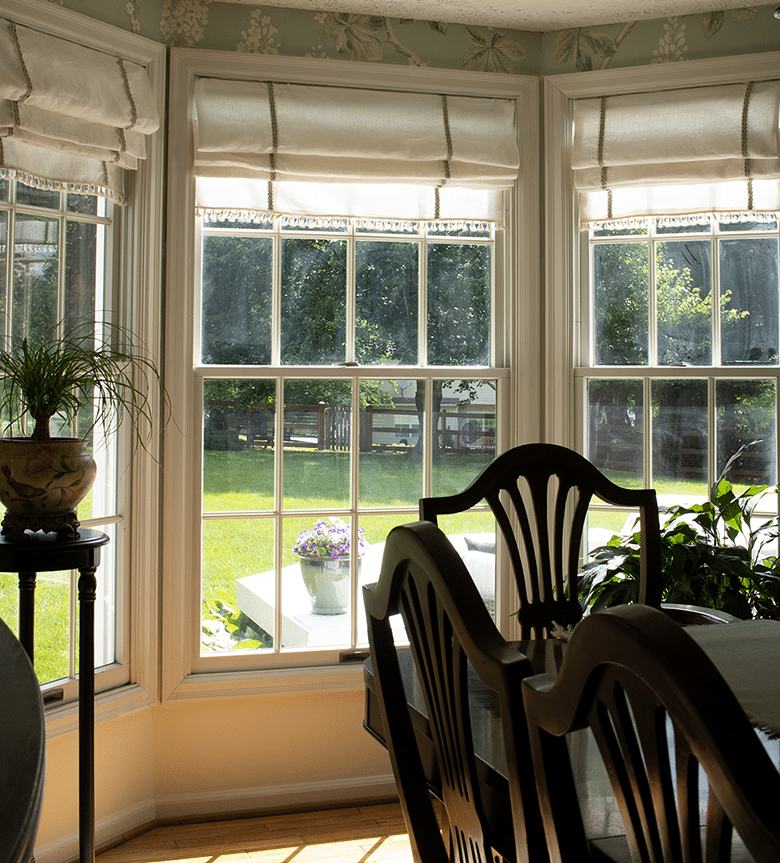
Most cotton and cotton-blend fabrics should work well for Roman shades. Decorator fabrics that say they are good for drapery work well, because they come in a 54-inch width and tend to be a bit heavier. If you want a billowy look, a lightweight cotton would be fine, though.
Choose a lining
If privacy is an issue, choose a blackout lining. It’s a little heavy to work with, but it will serve your purpose well.
If privacy is not an issue, then a standard lining is fine. I wanted to let in as much light as possible in my dining room, so I used the lightest weight lining I could find. Lining is necessary to the way I make these Roman shades, and it also looks nice from the outside of the window.
Choose an accent trim
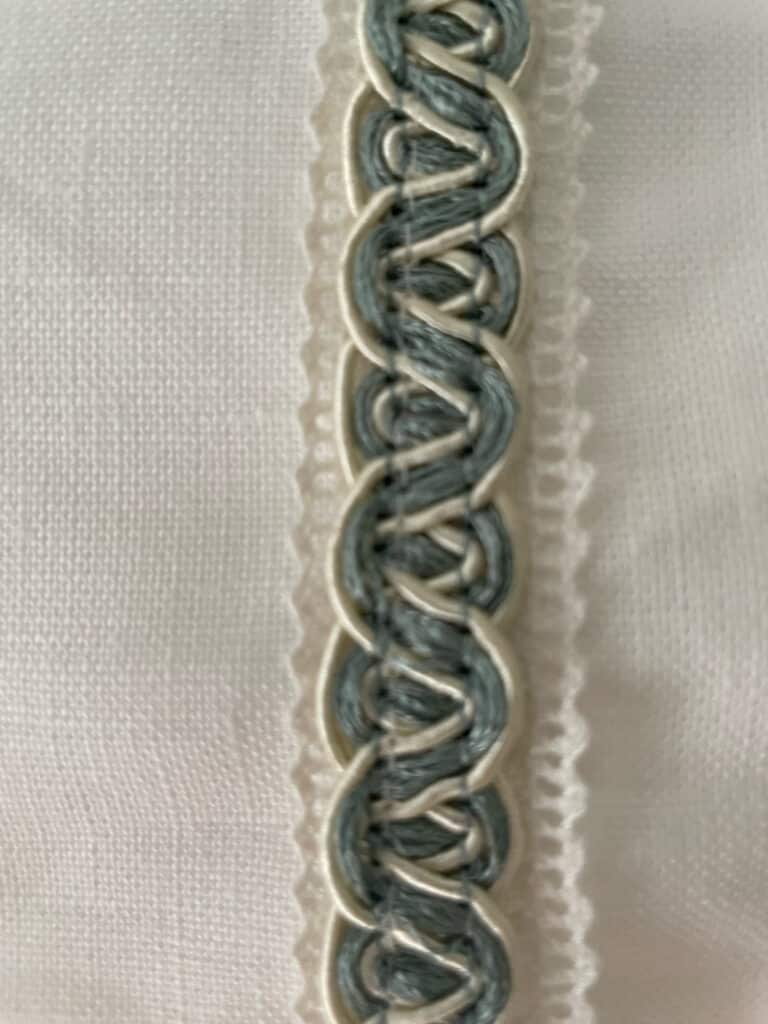
This is completely optional. If your fabric has an intricate pattern, you may not want to detract from it with a trim piece. I chose to add two vertical trim pieces to my Roman shades since they were solid white. An internet search turned up a beautiful two-inch wide trim tape that would have been perfect, but it was out of stock on every site. Instead, I combined two trims that I found in the sewing section of Hobby Lobby. The background piece is a neutral crocheted ribbon. I topped it with a colorful trim. Just about anything flat will work. You can be creative with this part!
Determine the number of folds for your Roman shade
The standard length for Roman shade folds is six to 10 inches. I wanted mine to be billowy, so I made them 10 inches. The example at the right shows a 45-inch Roman shade. You will have to decide, based on the length of your shade, how many folds you want. This will determine how far apart to space your ribs (wooden dowels).
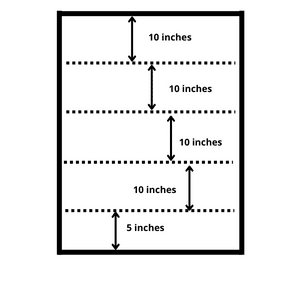
Some math is required to figure out how many folds will fit evenly into the length of your shade (do not include the overlap for the mini-blind mechanism at the top). Typically, the bottom fold is half the length of the folds above so that when your shade is pulled up the whole way, the bottom fold is overlapped and hidden by the folds above it. I wanted the bottom of my shade to hang down below the folds since I was adding a bottom trim, so I added two inches to the half length and made it 7 inches long.
Once you determine how many folds you want, you will need to buy wooden dowels to serve as the ribs. I used 5/16-inch wooden dowels. They come in different lengths, so you will have to calculate how many you need for your rib pockets.
Tip: If you’re unsure about this, make your shade and, before adding pockets for the ribs, lay it out on a large table or on the floor. Place pins at the intervals on each side of the shade where you think you want your folds to fall. Start at the bottom and pull each set of pins up to and behind the next set of pins. This should give you a visual and you can adjust the length based on what looks good to you.
Make the cordless Roman shades
Note: You may have a different method of making a Roman shade. That’s okay! You can use your method, and as long as you have rings on the back and you have allowed the extra fabric at the top to cover the mini-blind cordless mechanism, you can still use the mini-blind hack as described in the next section.
Supply list
• Fabric and lining as calculated, above
• Thread
• Decorative trim (if desired)
• Hot glue gun
• Roman shade rings
• 5/16 inch wooden dowels to use as rails
• Fabric glue
Step 1:
Cut your fabric and lining. Use the dimensions that you determined for your window (inside mount) or window casing (outside mount). Include the ½-inch seam allowance on all sides and the extra needed to cover the blind mechanism.
Step 2:
Add the trim. If you’re adding trim, sew your trim to the right side (the side that will show) of the shade fabric. Determine where you want the trim to fall and measure in from both side edges to make sure the trim will be uniform. My trim is 5 inches in on both sides. I just measured in 5 inches and drew a line with a pencil the entire length of the fabric so that I could follow the line when sewing on the trim. You could also attach your trim with fabric glue.
Step 3:
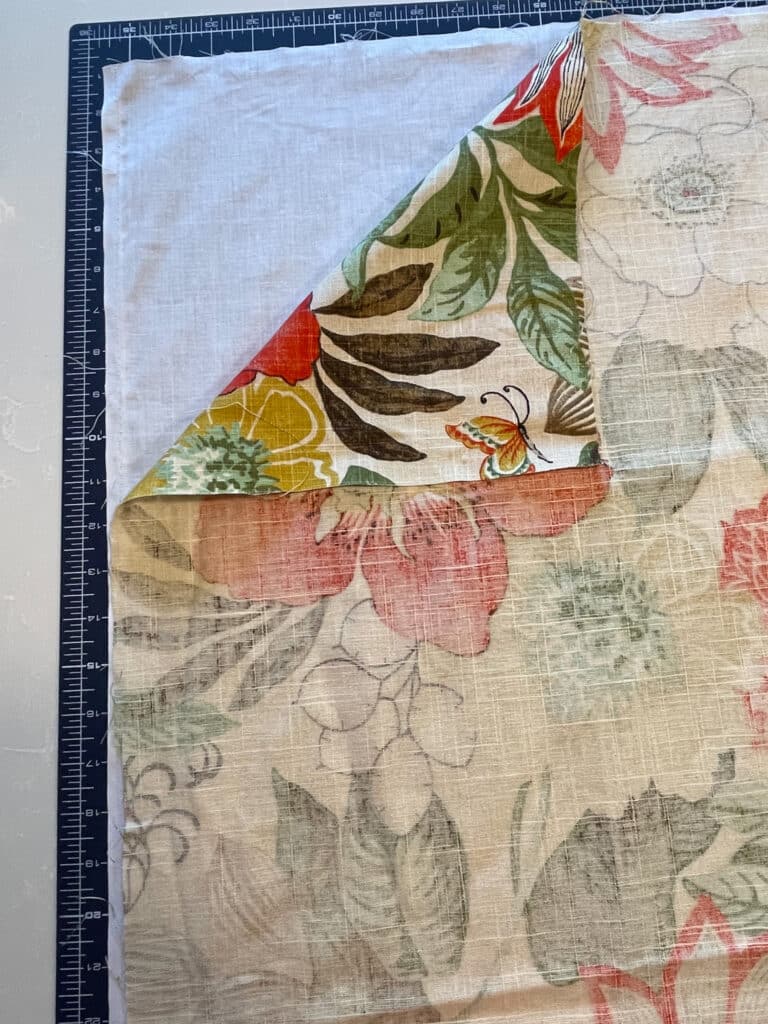
Sew the fabric to the lining. Put the right side of your fabric against the lining. Using a half-inch seam allowance, sew the lining and fabric together on all sides. Leave an opening at the top to allow for turning your shade right-side out.
Step 4:
Turn your shade right-side-out and iron flat. Make sure to poke out the corners and use a pin to pull them from the outside so that your corners are sharp. Turn the raw edges along the opening under ½ inch and press into place. Top-stitch to close the opening.
Step 5:
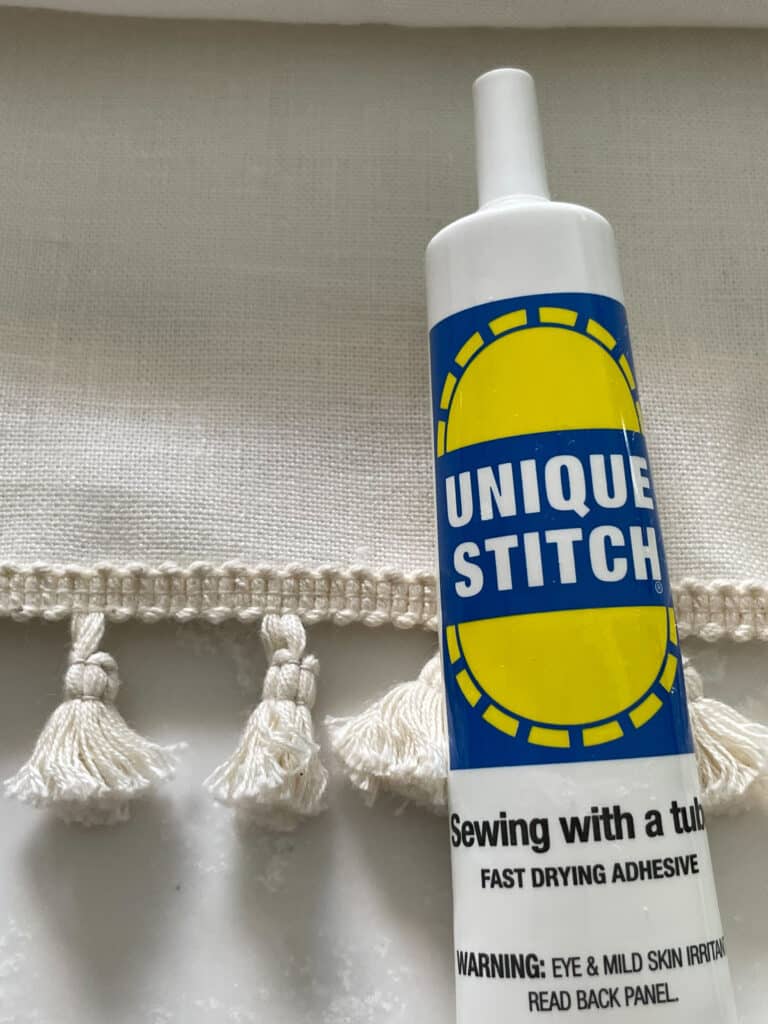
Add bottom trim. If you want to add a fringe or trim to the bottom, attach it now. Fabric glue works well for this step.
Step 6:
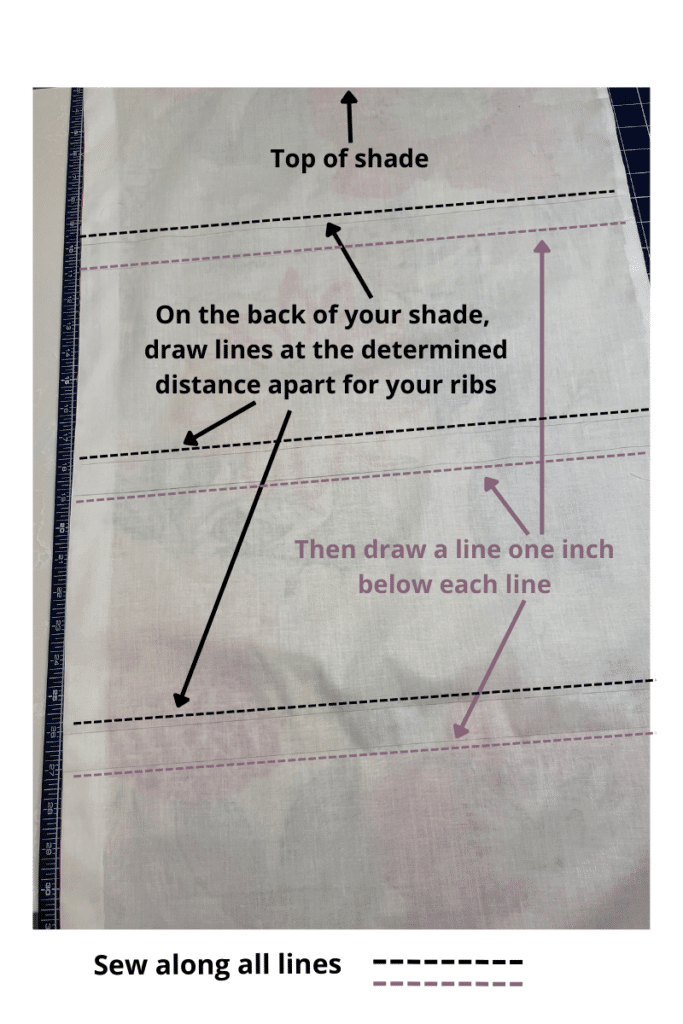
Create pockets to house the ribs for the Roman shade. Sew in one-inch pockets horizontally across your shade every 10 inches or however far apart you determined you wanted your folds to be. The pockets will house the wooden dowels. I measured and drew lines on the lining side of the shade. A fabric marker is probably best, but I just used a pencil since it was on the back and wouldn’t show. Mark your top lines first and measure 10 inches down for your next line and so on. Then go back and draw lines one inch below each of the top lines. Sew along the horizontal lines. As you’re sewing, backstitch at the beginning and the end of each row.
Step 7:
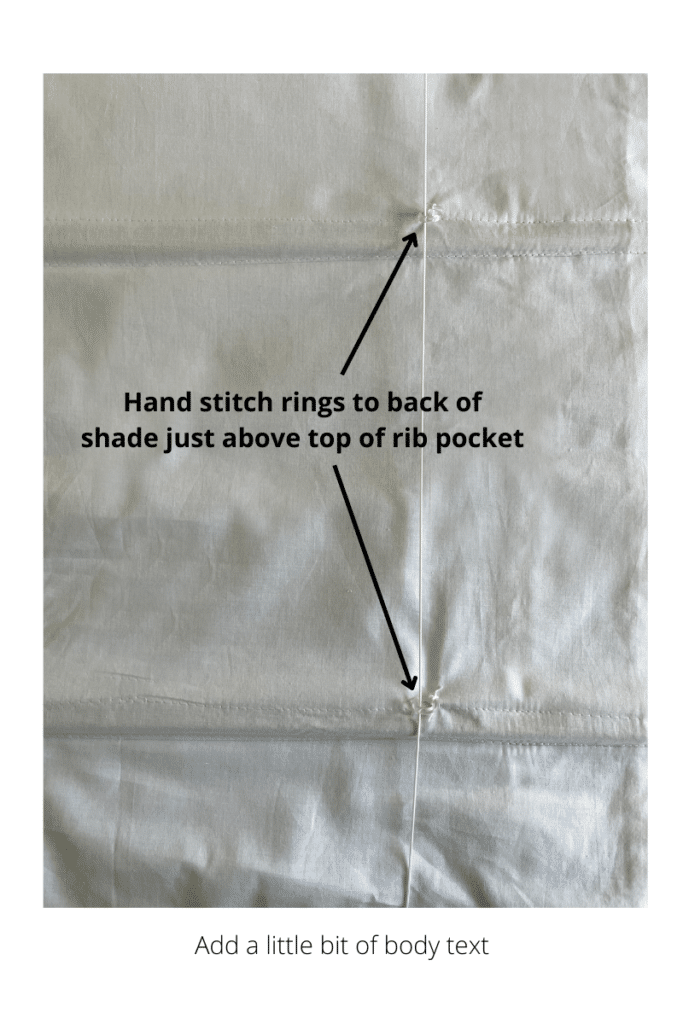
Attach the rings. Check your mini blind and determine where the cords are located. On my blinds, the cords are five inches in from each side. Mark a spot just above the TOP horizontal lines. Hand-sew the rings in each of these spots.
Step 8:
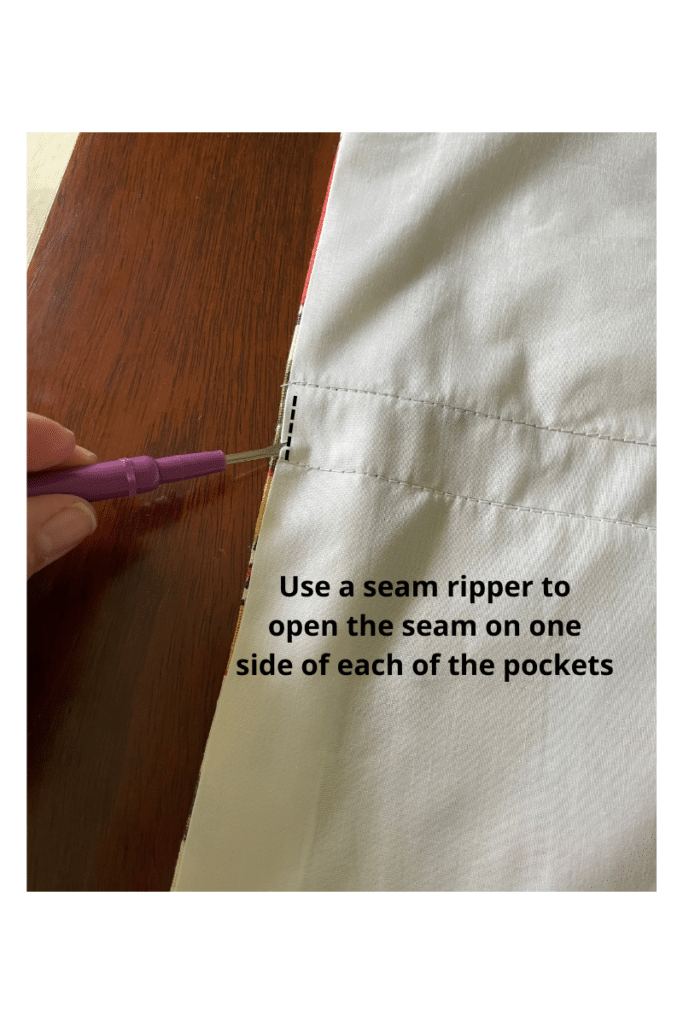
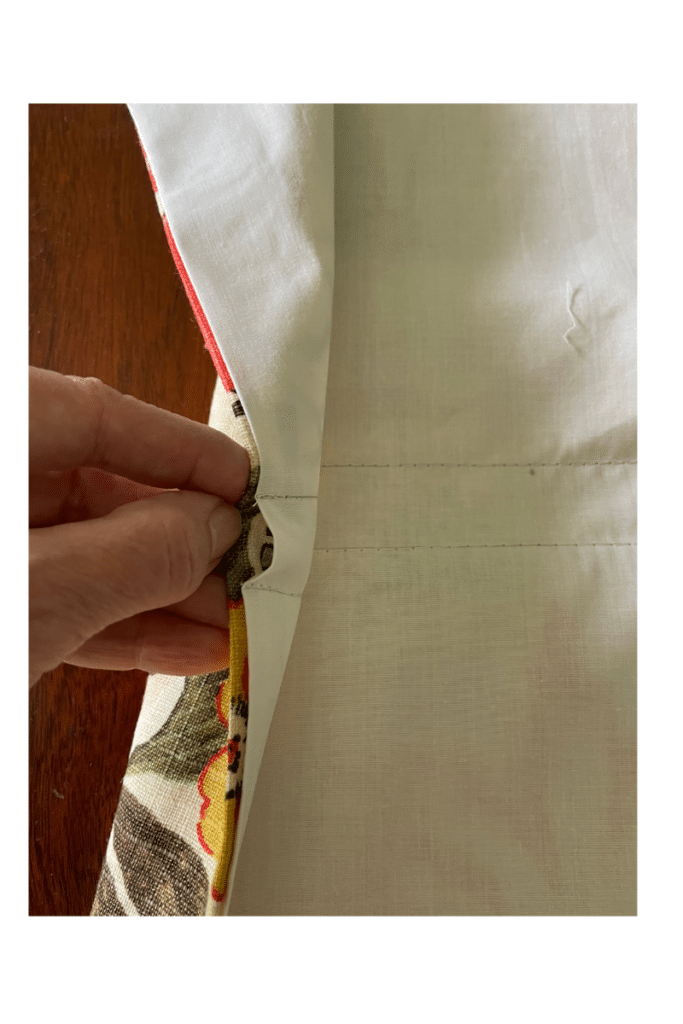
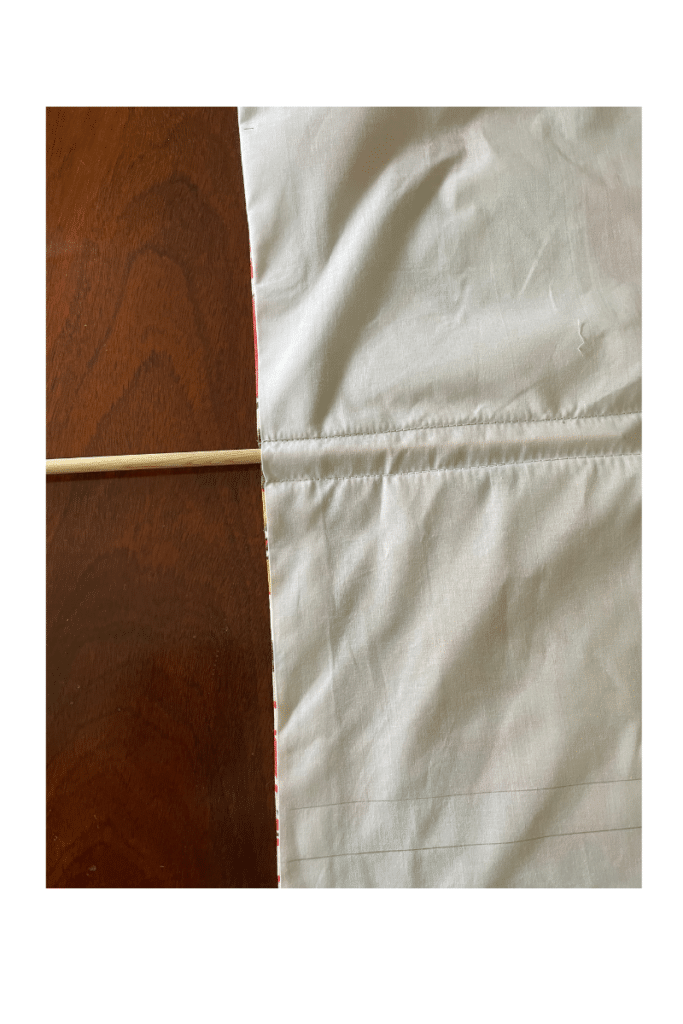
Insert the wooden dowels. I’m sure there are many ways to create rib pockets for Roman shades and my method might not be the most professional. But, it’s easy and I think it has a nice result. Along one of the side seams on your shade, use a seam ripper to remove the stitching in the one-inch space between the horizontal seams that created your pockets. If you backstitched your horizontal seams, that should prevent the side seams from unraveling farther than the one-inch opening that you are creating for each wooden dowel. Now you should have pockets with openings along one side of your shade that will allow you to insert your wooden dowels.
Prepare the mini-blind
See video at end of section for more detail
Step 1:
Detach the string ladder that is holding the slats in place. IMPORTANT: Snip the string ladder only and slide the slats down. DO NOT snip the single cord that is running through the slats. Keep the bottom piece in place.
Step 2:
Attach binder clips to hold the cord in place. With the single cord exposed and the bottom piece still in place, fasten a binder clip over the single cord at the spot where it exits the top mechanism housing. This prevents the cord from being sucked up into the housing. If this happens, there’s no retrieving it, and you’ll have to buy another blind. This might be the most important step in the whole process!
Step 3:
Remove the bottom piece and the slats. With your cord being held safely in place with a clip, remove the bottom piece and slide the slats off of the single cord. If you are planning to mount your shade using 3M strips, keep this bottom piece. You will have to retrofit it and use it to hang your blind.
Attach the Roman shade to the mini-blind mechanism
Step 1:
Remove the bottom piece and the slats. With your cord being held safely in place with a clip, remove the bottom piece and slide the slats off of the single cord. If you are planning to mount your shade using 3M strips, keep this bottom piece. You will have to retrofit it and use it to hang your blind.
Step 2:
Thread the cord through the rings. Keeping the clips in place, thread the cord through the rings, starting at the top. I like to tie a couple of knots in the bottom of the cord so that if the clip fails, the knots might keep the cord from slipping into the mechanism. Keep in mind that the knots have to fit through the rings. Once you’ve threaded the cord through the rings, tie the cord to the bottom ring.
Attach the top piece of the Roman shade to the mini-blind mechanism. You should have a length of fabric at the top that is the length of your folds plus the extra amount allowed to cover the mini-blind mechanism. Place this over the mechanism and use a hot glue gun to attach it to the top front edge. Note where the hardware clips will fall and do not glue on those two spots. This will allow you to cover the clips with fabric. Be careful not to drip hot glue into the mechanism.
Hang your blinds!
Now you’re ready to hang your blinds. If you are mounting them on the outside, or if you have very deep window sills, you should be able to use the mounting hardware that was included with your mini-blind.
If you have shallow window sills and chose to mount the shades inside using 3M Command Strips, you’ll have to use the hack below.
Hang your inside-mount blinds using 3M Command Strips
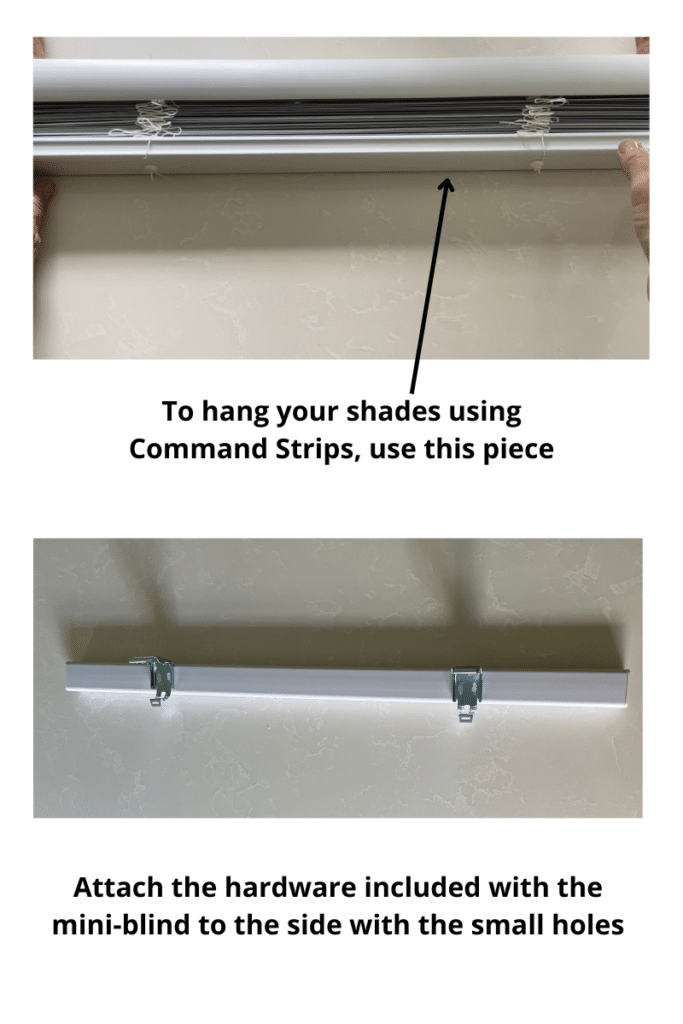
Because the top of the blind mechanism is hollow, there is not a surface to which you can attach your Command Strips. I remedied this by using the bottom piece that is below the slats on the mini blind. You can see this piece in the video, above, and in the photos, below.
Mini-blind hack for hanging Roman shades with Command Strips
Save the bottom piece when you remove the mini-blind slats.
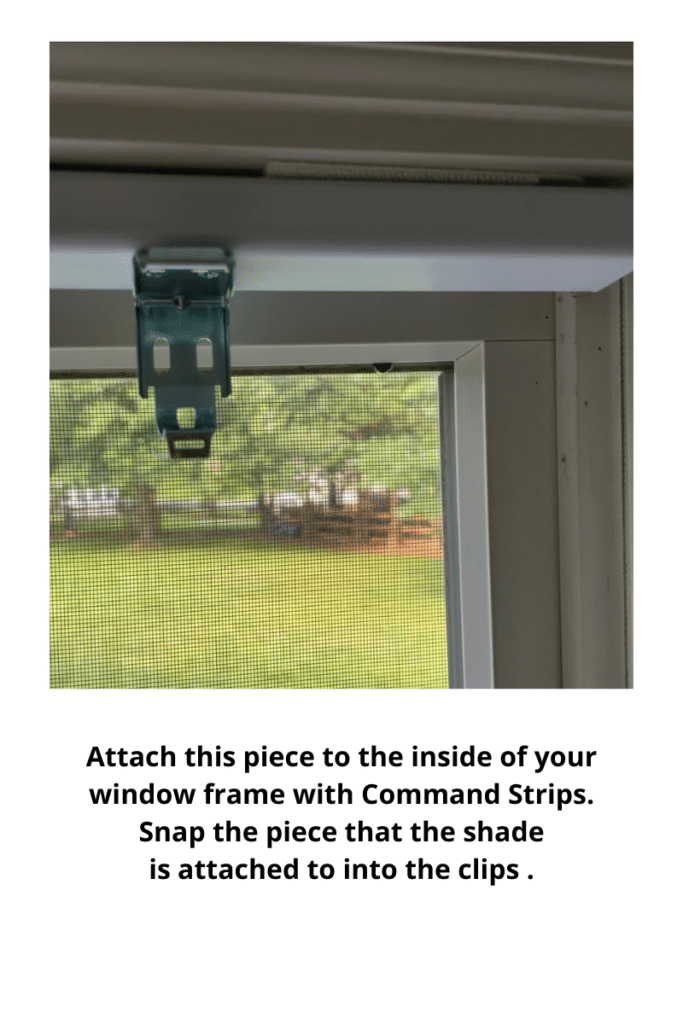
Attach the clips that came with the mini-blind to the side of the base piece that has the smaller holes. These will attach to this piece in the same way that they would attach to the inside of your window. You can even follow the directions included with the mini blinds for attaching the clips. Just pretend that the base piece is the top, inside of your window frame.
Once the clips are attached, hang this piece inside of your window frame using Command Strips. I recommend four or five large Command Strips to ensure that the blind will stay in place.
When using Command Strips, I always follow the instructions and clean both surfaces with alcohol before I attach them. In this case, clean the inside of the window frame and the side of the mini blind base piece that will attach to the frame.



21 Responses
Soooooo good Erin! They are gorgeous! 💚
Thank you, Jess! Let me know if you decide to make some shades of your own!
Thank you dear Erin. Your sew lesson was perfect and I do really feel I’m able to try it. God bless you🙏🙏🙏
I’m so glad to hear it. Thank you for your comment, Nina. Let me know how they turn out!
Hello, I was wondering if you added material to the length to account for all of the 1 inch pockets for the dowel rods ?
I didn’t, because the pockets don’t take up extra fabric. The seams for the pockets are sewn an inch apart, and the dowel goes in between them. They’re not sewn as pockets that stick out and take up extra fabric. Does that make sense? If you look at the diagram in Step 6 in the blog post, I think it explains this better. They might take up a little bit of fabric when the dowels are placed in the pockets, so you could add some fabric if you’re concerned about it, but you do not need to allow an extra inch for every pocket. I hope this helps.
Hello! Thank you for the tutorial. I’ve finished working on my shades, but find that when I pull them all the way down, they won’t stay down. The blinds spring-loaded retracting mechanism seems to not have enough weight pulling against it until it pulls the first fold of fabric up. This is problematic for me because they’re blackout blinds for a nursery. I’m wondering if you had this issue as well, especially so other folks know this for their blinds. I’m thinking of adding a metal rod in the bottom hem in place of my wooden dowel to add weight similar to what that metal bottom piece was adding to the blinds before.
I only pull my shades down partway, because they’re more decorative than functional in my dining room, so I didn’t encounter this. One other person reported the problem that you’re having. A metal rod might work. While it might not be ideal for everyday use, placing a binder clip on the cord against the mechanism once the blinds are pulled down does work. I tried it. If you refer to Step 2 of Preparing the Mini Blind in my tutorial, you can see where I placed the binder clip. The video shows it, too. If you do the same thing on the completed blind, it holds the blind in place wherever you choose. I’m sorry you encountered this problem, and I hope this helps.
Thank you for the tutorial! I especially like how you handled the rib pockets. Question about the fabric dimensions: if you start with the window measurements plus seam allowance, and the blinds are mounted inside the window casing, why would you need extra height to cover the blinds top? There would already be enough to glue to the front of the top. Thanks.
Thank you for your comment! The seam allowance is so that you can sew the front to the back for a finished look. The extra 1 1//2 to 2 inches is needed to cover the cordless blind mechanism. Even though it is mounted inside the casing, the mechanism is visible and has to be covered. I hope this helps!
Hi they look beautiful. How do you get them to open and close?
Thank you! The mechanism is made so that you just push them up and pull them down.
Hello,
I’ve been extensively searching for clear dyi instructions for cordless Roman blinds. Your instructions are very clear!! Thank you for such easy instructions. However, my one concern is how/if the shades can ever be cleaned/washed? I don’t know if using these in a kitchen environment would be an option because of that. Thank you!!
do you use hot glue gun to also glue THE BOTTOM PIECE to the fabric??
I did not use the bottom piece, but it could definitely be hot glued to the fabric. If you thread the cords back through the bottom piece, that should hold it in place. The glue would really just be keeping the fabric attached.
if using the bottom piece from the mini blinds do you hot glue it to the fabric?
Yes, you can hot glue the bottom piece to the fabric.
Love the project! Thanks for sharing the directions! One idea: If you use Velcro to attach the blind to the mini-blind header and leave the dowel pockets open, you’ll be able to easily disassemble them for cleaning.
Thank you for this idea! I’ve had questions about cleaning them. Velcro is a great suggestion.
Hello,
Thank you for letting us peek into your beautiful home! I love the colour scheme you have. Would it be possible to find out the name and the maker of the wallpaper in your dining room?
Thank you so much for your kind comment. The dining room wallpaper is Sanderson Chestnut Tree, and the color is grey blue. There are lots of pops of green in the pattern, which makes it work in my home.