I have received a lot of questions about how my painted kitchen cabinets have held up. We started our kitchen renovation 11 years ago with a kitchen cabinet paint job. Many additional changes have happened since then (you can read about some of them here and here), but the painted cabinets have remained, and I still love them.
Table of Contents
ToggleWhy paint your kitchen cabinets?
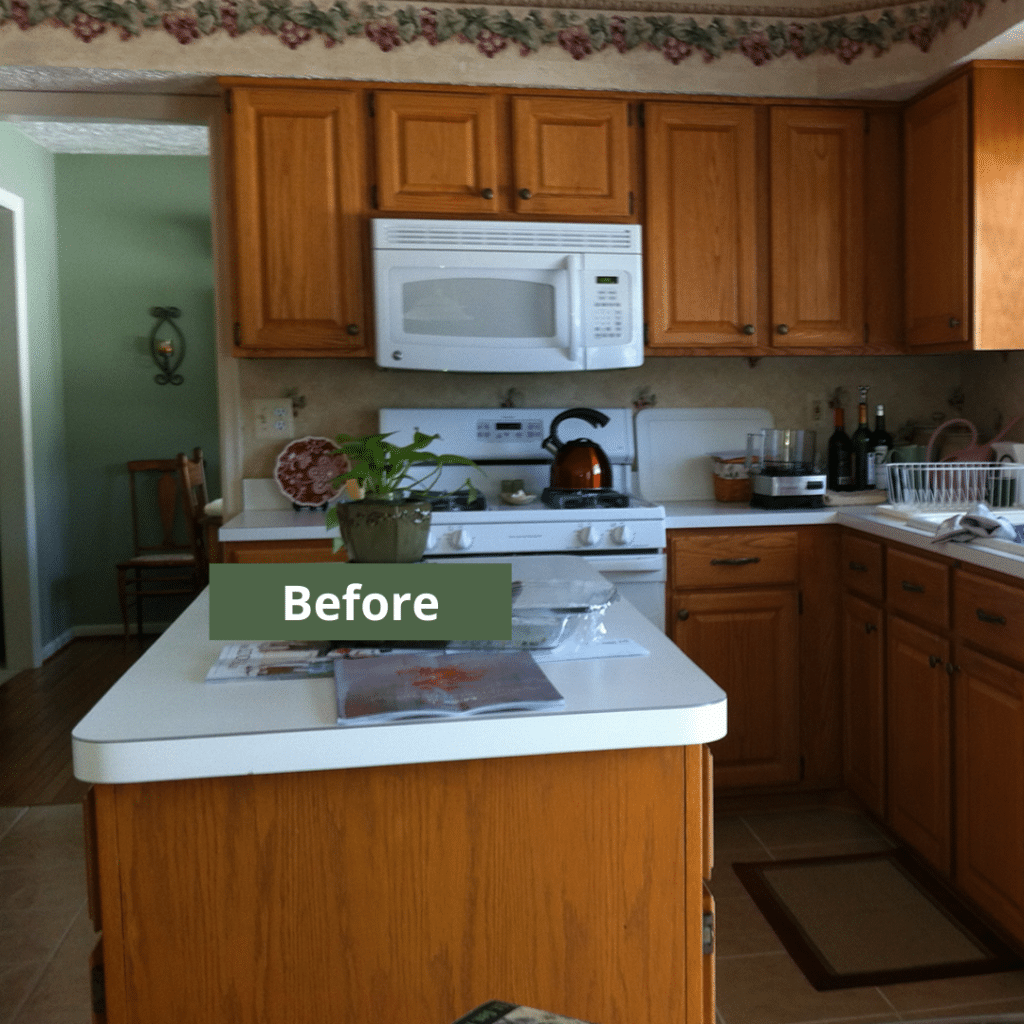
I chose to start our kitchen makeover by painting the cabinets for several reasons. There were many problems with the kitchen, but the orangey oak cabinets seemed to be the biggest eyesore. If you have these oak kitchen cabinets, you know what I mean. Some are a pretty brown color, but mine were very pumpkin. They were solid wood and in good shape. I also liked the design of the cabinet doors. They’re pretty simple with a raised panel and no arched top. I was also happy with the layout of my kitchen, so the existing cabinets would continue to work.
Choosing a color
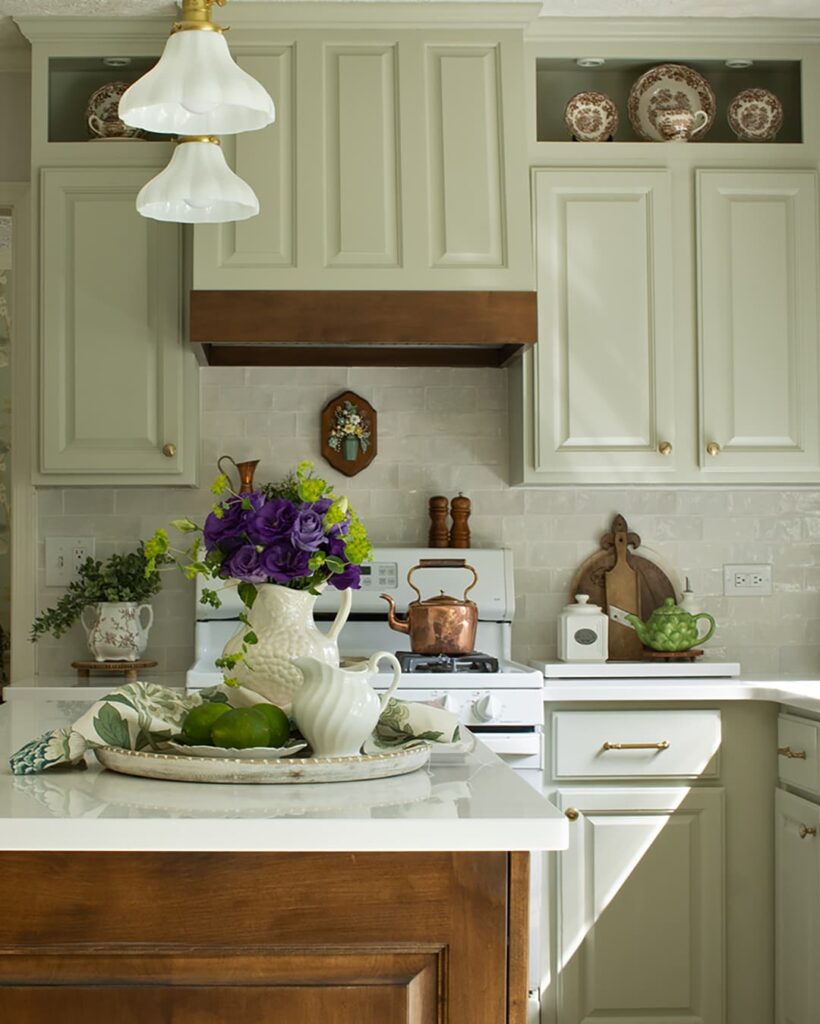
Choosing a color was the biggest challenge. I like white cabinets, but our appliances were white, and I thought it might be too much. Also, I didn’t want the white paint to clash with the appliances. The appliances are a bright white, and that’s not the color I would have chosen for my cabinets. If you follow me on Instagram or have read my blog, you might know that green is my favorite color. I brought home many green paint samples. While I didn’t want white, I did want lighter cabinets, so I went with a light sagey grey green. The color is Benjamin Moore Vale Mist.
We chose to paint a small area first and live with it for awhile before painting the entire kitchen. I recommend doing this before purchasing a lot of paint in a color you don’t like. I actually painted a small section of lower cabinets a creamy white before deciding on the green color. The section I painted was next to the white stove, and the clash of whites really bothered me. The photo, below, shows the Vale Mist color we chose.
Logistics
Once we decided on the color, I had to come up with a process. I wasn’t sure where I would have used a paint sprayer if we had one. We had to live in our house during this renovation, so it wasn’t empty. I envisioned setting up a plastic lined “paint room” in the garage, but it seemed like it could create a mess. So, I just went the old-fashioned route and used a paint brush and a foam roller. We set up a series of sawhorses in the garage to hold the doors while I painted.
I worked through the kitchen in sections, removing the cabinet doors and painting them along with their corresponding cabinet bases. The painted doors were replaced before moving to the next section. This kept the garage from being overwhelmed with doors, and it helped me keep track of which door went where. We made a simple diagram of each section before we removed the doors, and assigned a number to each door on the diagram. We wrote the door numbers on post-it notes and stuck them on the corresponding doors. As I painted each door, I stuck its post-it note on the surface next to the door. Once the doors were dry, the post-it notes went back on the doors making it easy to replace them in the appropriate location.
The painting process
Having worked out the logistics, I needed to figure out the painting process itself. Since we had chosen a Benjamin Moore color, it made sense to use Benjamin Moore’s Advance paint. It had great reviews, so I was happy to try it. The clerk at the paint store recommended having the primer (also Ben Moore Advance) tinted to match my paint. It was such a good idea. I think the paint covered more easily.
Prepping the cabinet doors
Again, I chose the old-fashioned method. I sanded off all of the gloss. This did not take the cabinets down to bare wood, but the paint store clerk told me the primer would do a good job of covering any stain color that was left (he was right!). I used a palm sander on the flat surfaces and small sanding blocks to get into the grooves. This was time consuming, but it paid off.
Prepping the cabinet bases
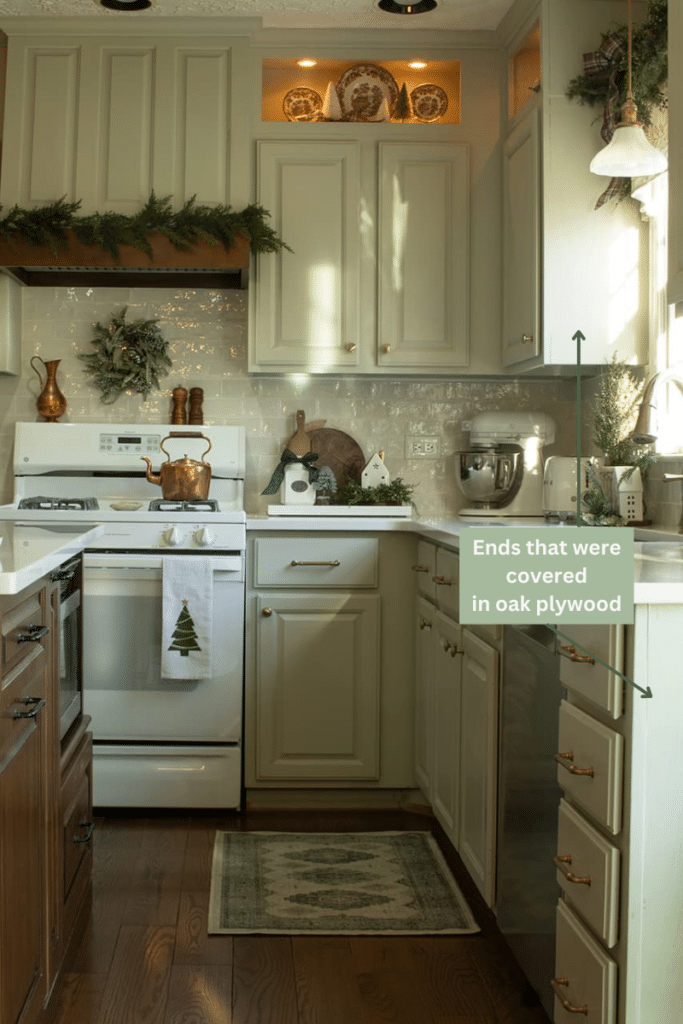
I used the same sanding method on the bases. Our cabinets are solid wood, which must have been builder grade in the early 90s. The cabinet base fronts are solid oak, but the rest of the structure is made out of particle board. The sides that show were covered in something like contact paper with an oak appearance. We knew that if we painted over it, it would have a different appearance than the cabinet fronts and doors. My husband covered the sides with quarter-inch oak plywood, so that it would have the same grain as the rest of the cabinets.
You have to be okay with the wood grain
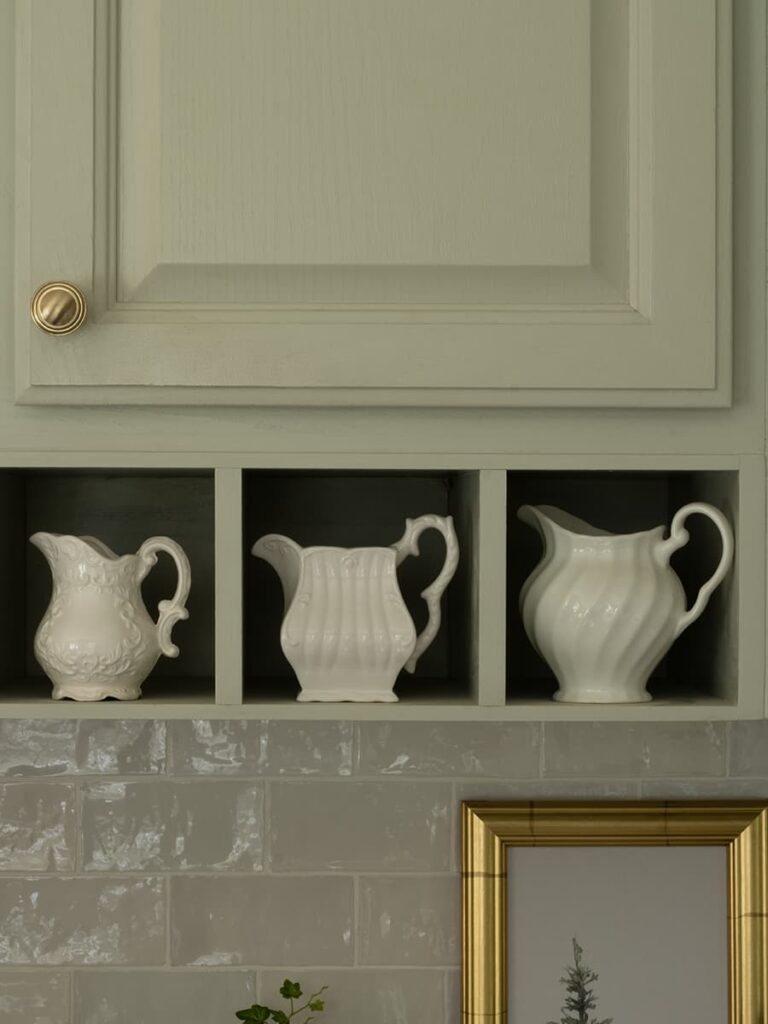
That brings me to the heavy grain that is inherent in oak. The wood grain texture shows through the paint. I like the appearance of the grain as it speaks to the solid wood structure of the cabinets. A lot of modern cabinets are made of maple, which has a very smooth texture. There are ways to eliminate the grain in oak. I’ve seen people skimcoat it with wood filler. That seemed like a lot of work to me, and, again, I like seeing grain. But, you should know before you paint, that the texture of the grain will show.
Painting the cabinets
There are a lot of cabinet painting tutorials, but, again, I just used the old-fashioned method. I applied one coat of Benjamin Moore Advance Interior primer tinted to my Vale Mist color on the fronts and backs of the cabinet doors and the cabinet bases. Then, I followed with two coats of Benjamin Moore Advance Interior Paint in a satin finish. I used a good angled brush for the difficult-to-reach grooves and a microfiber roller for the flat surfaces. Each coat was given an overnight dry time before recoating. This is longer than suggested, but I think it creates a stronger finish. The paint is self-leveling so brush strokes and roller marks don’t show.
Kitchen cabinets take a lot of abuse
Most kitchen cabinets take a lot of abuse–I know ours do. We have continuously had two dogs since we painted the cabinets, and one of our three kids still lived at home. Our dogs go in and out through the patio doors in our kitchen. If they come in on a rainy day, they shake rain (and sometimes mud) all over the cabinets, so we’re often wiping down the cabinets. Our current dog, Olive, is quite smart and knows which drawer houses her treats. She has been known to open the drawer with her claws. We like to entertain, and we all know that no matter what you do, everyone gathers in the kitchen. Further, before our most recent addition of a new island, our trash can was housed in a Rev-a-shelf behind one of the cabinet doors. This door was constantly opened and closed, and trash sometimes missed its mark, hitting the cabinet. There are lots of opportunities for the cabinets to get bumped, scratched, scraped and otherwise abused.

Surviving other renovations
Our kitchen cabinets endured further abuse as we continued to renovate our kitchen. We moved them out and back while we added a new backsplash and counter tops. I covered them when we removed our tile floor, but that tile flies when you’re breaking it up with a power tool!
How have our cabinets held up???
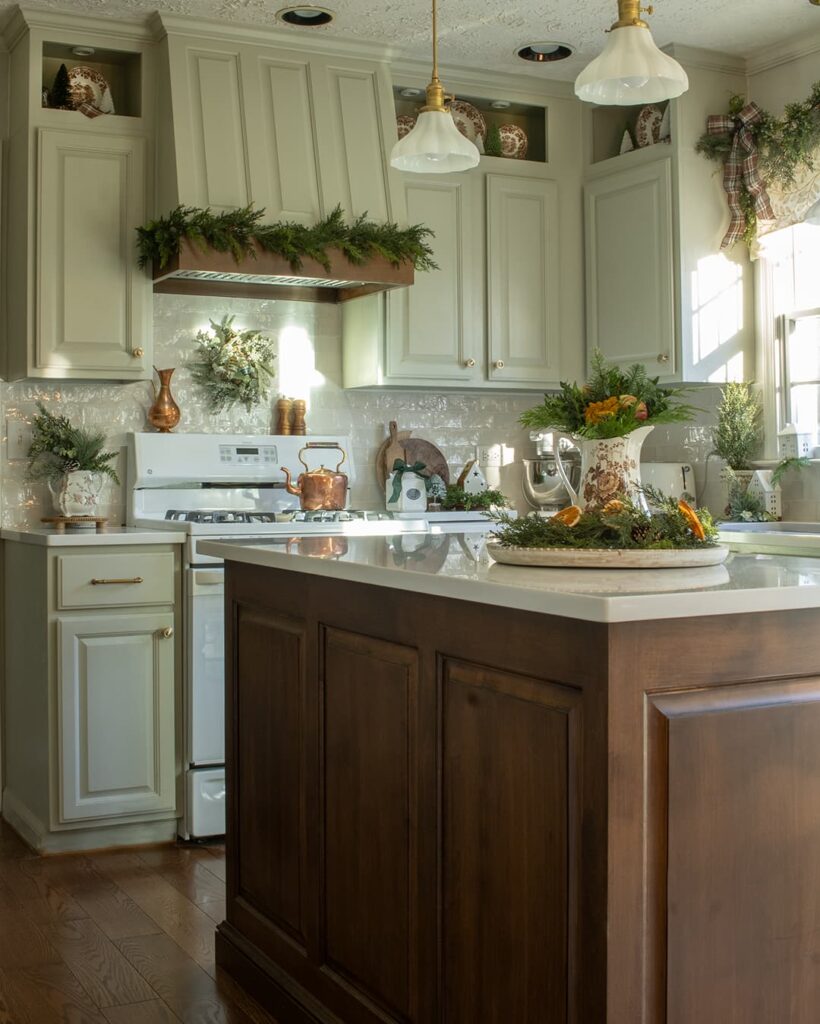
Drum roll. . . our cabinets look as good as the day I painted them. Honest! I had to touch up the drawer that Olive learned to open with her claws (her treats have been moved to a higher drawer), and the door that housed the trash can got a fresh coat of paint when we relocated the trash can to the new island. Those are pretty extreme circumstances. During the most recent updates, when we got a new backsplash and counter tops, we swapped out our hinges for hidden hinges. That update left some holes in the cabinet bases that had to be filled and painted. We also added new hardware that was a different size than the previous hardware. Those holes had to be filled and painted as well. I was worried that the newly painted spots would show up as a slightly different color, but you can’t spot the places that were painted over.
Painted cabinets make it easy to add to your cabinetry
I’ve mentioned that we recently added a new island. It’s a wood finish, so we have a two-tone look in our kitchen, which I love. We also added a new range hood. Both were custom pieces. I painted the range hood with Vale Mist and it fits in seamlessly. The base is wrapped in wood that matches the island for a cohesive look.
Would I paint my cabinets again?
Absolutely! It required some time and hard work to do it right, but I love the lighter look, and my painted cabinets, after 11 years, have stood the test of time!


6 Responses
Your article was perfectly timed for me, Erin, as I’ve realized our painted cabinets need redoing!
I’m impressed with how much you did on your own!💪
Lots of what you did was already in my plan, but I appreciate several other points you made that helped!
You know I love how your kitchen turned out; it’sone of my favorites on the ‘gram!💚
Thank you so much, Beverly! Glad you found some helpful tips! Good luck with your project!
I love your kitchen! It has a calming effect. I think you have given me a new color to try.
Thank you, Crystal! It’s a very calming color. I hope you’ll check it out!
You did an amazing job with this, Erin! Your choice of color and close attention to detail in the painting process has paid off over the past 11 years! It’s funny…when we painted our kitchen cabinets, the one cabinet that needs an occasional touch-up is the door that houses the trash can. It must be the frequent use!
Great post, Erin! I’m excited to see more! ~Missy
Thank you, Missy! I think people have bad aim when shooting for the trash can! I appreciate you reading my post!